CREATING A SEQUENCE
SETTING UP A SEQUENCE
Double-click on a desired clip [a] so that it appears in the source monitor [b].

Use your mouse, the keyboard or the Source Monitor Controls to scrub through the video and position the Playhead [c] at your desired in point. Select the [MARK IN] button or press [i] on the keyboard. Adobe Premiere will highlight the runtime that the clip is selected for.

Once you have marked an in point, the material "downstream" from the in point is selected. Here [d] indicates the selected portion of the clip.

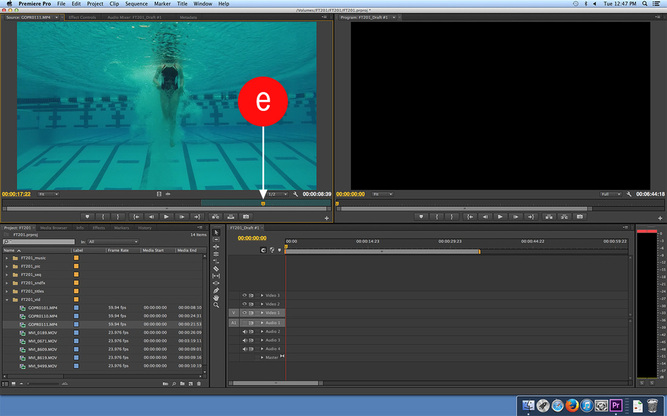
Position the playhead at the desired out point [e]. Select the [MARK OUT] Button or press [o] on the keyboard.
Once the out point has been added, only the material between the in and out points is selected (the highlighted material indicated by [f] here). Adobe Premiere will remember the in and out points added to clips even if you close the clip.

Drag and drop selected clip into the [VIDEO 1 TRACK] of the Timeline. You can also add the clip to the Timeline using the [INSERT CLIP] or [OVERWRITE CLIP] buttons, or the [,] (insert) or [.] (overwrite) keys.
See Sequence Editing on the Timeline for more on these different kinds of edits.
See Sequence Editing on the Timeline for more on these different kinds of edits.

Here we see the clip successfully added to the sequence in the timeline. Repeat the above steps to add additional clips to the sequence.

CLEARING IN & OUT POINTS
If you would like to remove in or out points on the timeline that are cluttering your view, simply click on the desired clip and press:
- ALT/Option + I: Remove In Point
- ALT/Option + O: Remove Out Point
- ALT/Option + X: Remove In & Out Points
Click here to proceed to the next section of this editing guide.
