EXTERNAL DRIVE SETUP
DRIVE SPECIFICATIONS
When editing sound/video content, it is recommended that the external drive used has a Firewire 400 (or above, preferably Firewire 800) capability, up to 1 terabyte (TB) of storage capacity, and functions at 7200 RPM.
ORGANIZING THE DRIVE
Take time to carefully organize media within your drive. This allows a user to easily find and uploaded content, manage multiple types of media files and quickly fix problems if they arise later on in the editing process.
STEP 1: Create a folder within the external drive and title the folder with the project’s name. Take a moment to think of a unique, accurate name. You’ll be using this name a lot, and it’s difficult to change it later. Don’t use slashes or periods, as they confuse the computer’s file systems.
STEP 2: Create sub-folders within the project folder for picture, sound, sound effects and music.
- PROJECTNAME_pic: Video & Picture Folder
- PROJECTNAME_snd: Folio Sound Folder
- PROJECTNAME_sndfx: Additional Sounds & Sound Effects Folder
- PROJECTNAME_music: Music Folder
- PROJECTNAME_qt: Quicktime folder bin for completed project file

IMPORTING FROM CARD TO DRIVE
Before importing your files into any editing program, it is necessary to save your files from your SD or CF card on an external drive.
Insert your memory card into a card reader. Memory card icon will appear on the desktop. Double-Click on the icon.

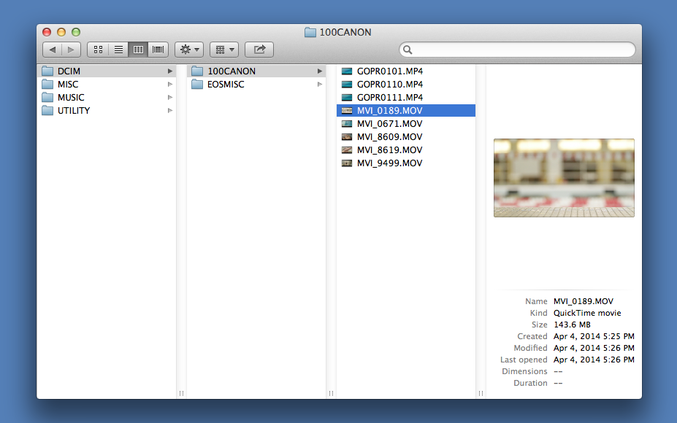
Click on [DCIM] > [100 Canon] > [.MOV FILE] to preview recorded video files.
Click on [MUSIC] > [.WAV FILE] to preview recorded audio files.

Drag video content (a) from memory card and drop into PROJECTNAME_pic folder on external drive.

Drag audio content from memory card and drop into PROJECTNAME_snd folder on external drive.

Eject the memory card by dragging the icon into the TRASH. Once the memory card icon has disappeared, the card may be removed from the card reader.
Click here to proceed to the next section of this editing guide.
