GETTING STARTED WITH PREMIERE
CREATING A NEW PROJECT & IMPORTING MEDIA
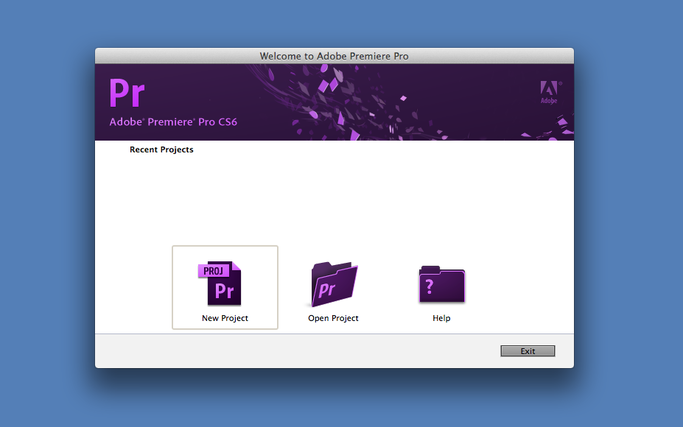
Launch Adobe Premiere Pro CS6. The Welcome Screen should appear.

Click New Project to open a new project dialog box. It will have two tabs, one that says Scratch Disks and one that says General.
GENERAL SETTINGS
Click on the General tab and select the following:
VIDEO RENDERING & PLAYBACK RENDERER: Select Mercury Playback Engine Software Only
VIDEO, DISPLAY FORMAT: Select Timecode
AUDIO, DISPLAY FORMAT: Select Audio Samples
CAPTURE, CAPTURE FORMAT: Select HDV
VIDEO RENDERING & PLAYBACK RENDERER: Select Mercury Playback Engine Software Only
VIDEO, DISPLAY FORMAT: Select Timecode
AUDIO, DISPLAY FORMAT: Select Audio Samples
CAPTURE, CAPTURE FORMAT: Select HDV

SCRATCH DISK SETTINGS
Set all settings in the Scratch Disks tab to Same as Project. This will save all associated media files with the project file in the same folder, making sure that all media is saved in a single central location.

SETTING THE DRIVE LOCATION
Click on the Browse button and select external drive.

Select the project folder that you created on your drive.
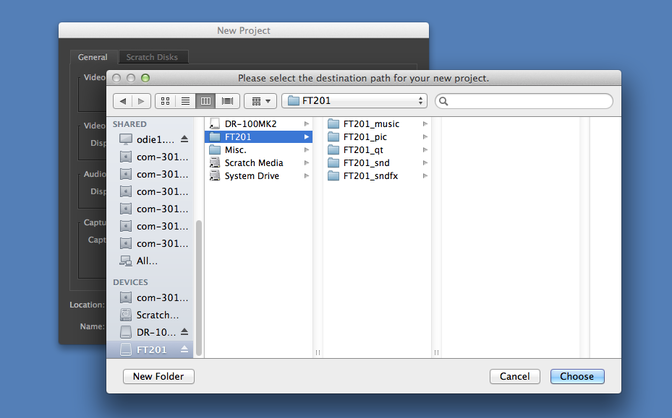
NAMING THE NEW PROJECT
Name the project, preferably the same name as the project name on the external drive. This will prevent confusion later on.
Make sure settings are correct. Click [OK] to continue.
Make sure settings are correct. Click [OK] to continue.

SETTING UP A SEQUENCE
Immediately after creating a new project, Adobe Premiere Pro CS6 will always assume the user wants to create at least one video and/or audio sequence. A sequence stores a series of clips, images or audio tracks that can be played one after another or blended together. You can have as many sequences as you desire.
The New Sequence dialog opens immediately after creating a New Project. It has three tabs: Sequence Presets, Settings, & Tracks. If you do not know the video format you have recorded on, it is possible to exit out of this box by clicking [CANCEL] and importing your footage directly, which causes Adobe Premiere Pro to automatically match with your footage.
For the purposes of this class, set your new sequence to the Canon EOS-M preset.

Set the Sequence Preset to [CANON XF MPEG2 1080p24].
Click on the triangle next to the group [CANON XF MPEG2] from that menu.
Click on the triangle next to the [1080p] box.
Select [CANON XF MPEG2 1080p24] from that menu.
Click on the triangle next to the group [CANON XF MPEG2] from that menu.
Click on the triangle next to the [1080p] box.
Select [CANON XF MPEG2 1080p24] from that menu.
THE SETTINGS AND TRACK TAB
For the purpose of this class, do not change anything in the [SETTINGS] tab and use the [Canon XF MPEG2] presets.

For the purpose of this class, do not change anything in the [TRACKS] tab. Once again, continue to use the [Canon XF MPEG2] presets.

NAMING YOUR SEQUENCE
Click the [SEQUENCE NAME] box at the bottom of the menu box and name your sequence.
Make sure all settings are correct. Click [OK] to continue.
Make sure all settings are correct. Click [OK] to continue.

Click here to proceed to the next section of this editing guide.
