PREMIERE PRO CS6 BASICS
First, a little terminology...
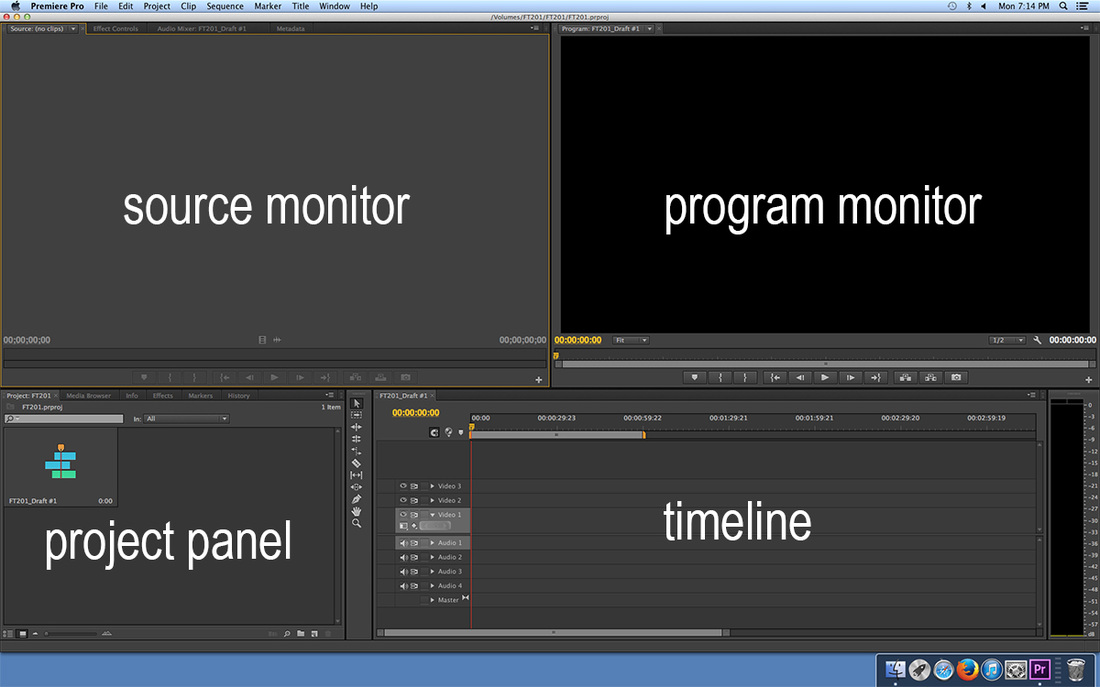
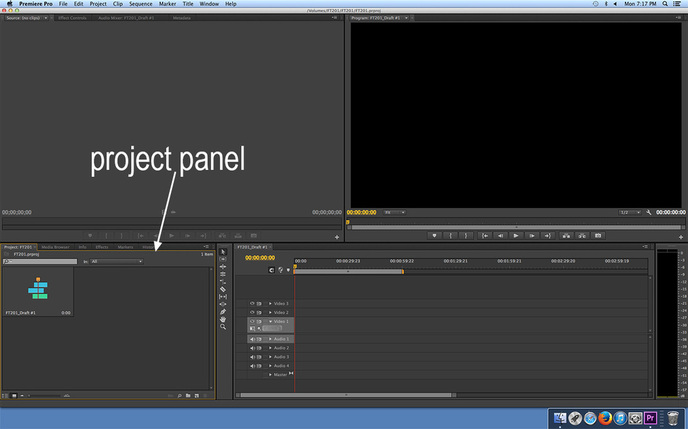
THE PROJECT PANEL
Anything imported into Adobe Premiere Pro CS6 will appear in the Project Panel. Everything that appears in the sequence must also appear in the Project Panel. If a clip is deleted in the Project Panel, the clip will automatically be removed from the sequence.
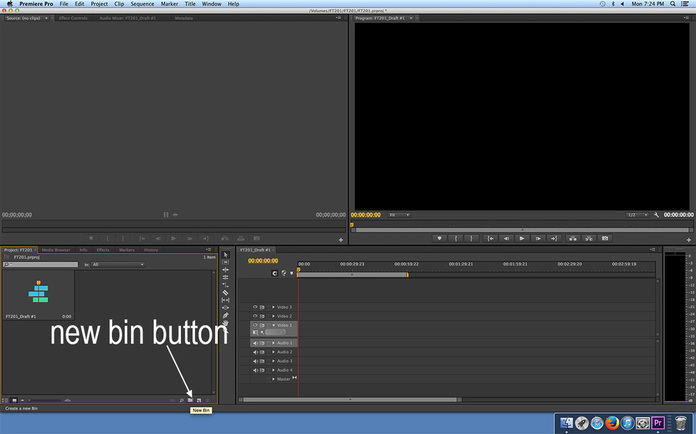
CREATING AND MANAGING BINS
Before importing your media, it is critical to customize the Project Panel in order to keep everything well organized. Working with images, audio files and video clips can get very chaotic, very fast. Make sure to stay organized with folders, also known as bins in Adobe Premiere Pro.
Select the [NEW BIN] button at the bottom of the Project Panel.
Create and name several bins. The same naming system used for labeling content in your external drive should work for your bins.

Some possible bin names:
PROJECTNAME_ seq:
Timeline Sequence bin
PROJECTNAME_pic:
Picture bin
PROJECTNAME_vid:
Video bin
PROJECT NAME_snd:
Recorded Sound bin
PROJECTNAME_sndfx:
Additional Sound Effects bin
PROJECTNAME_music:
Music Tracks bin
PROJECTNAME_titles:
Title cards bin
PROJECTNAME_ seq:
Timeline Sequence bin
PROJECTNAME_pic:
Picture bin
PROJECTNAME_vid:
Video bin
PROJECT NAME_snd:
Recorded Sound bin
PROJECTNAME_sndfx:
Additional Sound Effects bin
PROJECTNAME_music:
Music Tracks bin
PROJECTNAME_titles:
Title cards bin

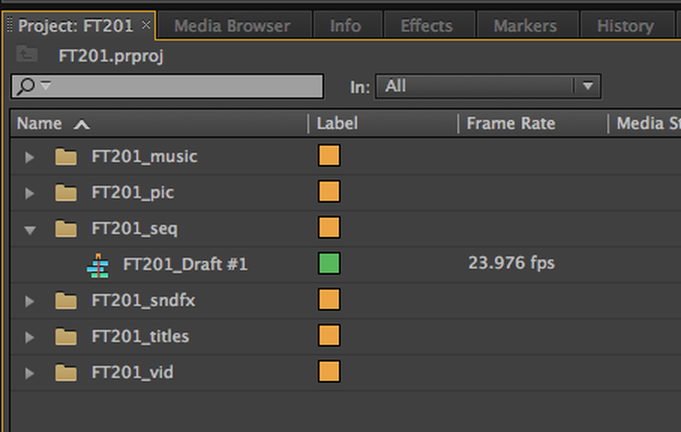
Set the view preference to [LIST] or [ICON], by pulling down the drop down menu at the top of the project panel.

For the purposes of this class, we will be using [LIST] view setting. This is what your bins should look like in the project panel in [LIST] view.

A default first sequence was automatically created when you started a new project. Drag and drop that
sequence into the
PROJECTNAME_seq bin.
sequence into the
PROJECTNAME_seq bin.

Select the PROJECTNAME_seq bin to work on sequence. Note that the triangle is facing down when the bin is selected, and the sequence in the bin is visible in the panel.
IMPORTING TO THE PROJECT PANEL
All media from the external hard drive can be imported into the project panel, including audio tracks, video clips, still images, sound effects, music, special effects, etc.
Select [FILE] > [IMPORT], [CTR/CMD + I], or [Double- Click inside of the Project Panel] to open the standard Import dialog.

Select [EXTERNAL DRIVE] > [PROJECT FOLDER] >
[PROJECTNAME_pic/snd/etc].
Select desired video [.MOV file], still image [.jpeg, .psd or .png file] or audio tracks [.WAV file] and click [IMPORT].
[PROJECTNAME_pic/snd/etc].
Select desired video [.MOV file], still image [.jpeg, .psd or .png file] or audio tracks [.WAV file] and click [IMPORT].

Drag and drop imported media into designated bins within the Project Panel. Here we can see both audio and video files that have been placed in their respective bins.

IMPORTING STILL IMAGES
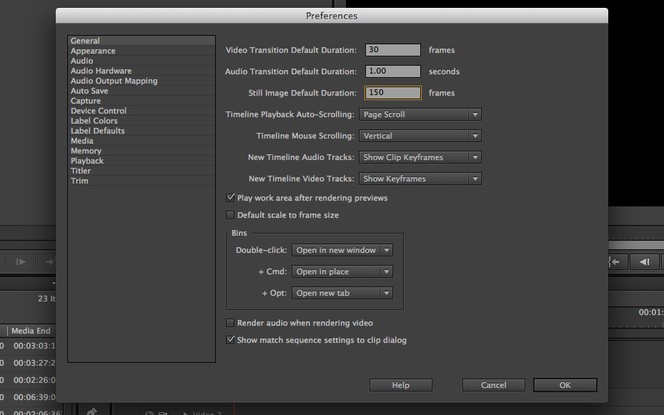
Importing stills works much the same as other media. However, while videos and audio tracks will play at their originally formatted length, graphics and photos will be imported at a default duration. Here's how to change the default duration:
Select [ PREMIERE PRO] > [PREFERENCES] on the top panel > [GENERAL]. Change the number of frames in the Still Image Default Duration box. Remember, there are 24 frames in a second of video. Select [OK].
THE SOURCE MONITOR
The Source Monitor allows you to view pictures, video clips or audio tracks from the Project Panel before inputting them into your sequence.

The Source Monitor has a number of different playback control buttons that allow you to scrub through the clip/audio track and select [IN] and [OUT] Points.
a. Add Marker
b. Mark In
c. Mark out
d. Go to IN
e. Step Back (Left)
f. Play
g. Step Forward (Right)
h. Go to OUT
i. Insert
j. Overwrite
k. Export Frame
b. Mark In
c. Mark out
d. Go to IN
e. Step Back (Left)
f. Play
g. Step Forward (Right)
h. Go to OUT
i. Insert
j. Overwrite
k. Export Frame

KEYBOARD SHORTCUTS FOR THE SOURCE MONITOR
These Keyboard Shortcuts may be applied to the Timeline as well.
- M: Add Marker
- J: Plays clip backwards
- JJJ: Moves the clip backwards faster
- K: Stops clip
- L: Advances clip forward
- LLL: Moves the clip forward faster
- SHIFT + J or L: Moves clip forwards or backwards one frame at a time
- SHIFT + I: Go to In Point
- SHIFT + O: Go to Out Point
- CTRL/CMD + SHIFT + SPACE: Places Clip from [In] to [Out] Point
- [,]: Insert
- [.]: Overwrite
THE TIME RULERS
There are Time Rulers on the Timeline as well as in the Source and Program Windows.
Time Rulers allow you to navigate through the timecode of your clips or your sequence. Time always goes from left to right, and the location of the playhead gives you a visual reference in relation to your clips.

Click the playhead in the Timeline ruler to drag it left or right. Dragging through content in the sequence is called scrubbing.
ZOOM BARS
There are also Zoom Bars on the Timeline and Source and Program Windows.
The zoom bars increase or decrease the size of the clip in the Timeline or window, making it larger or smaller and therefore faster or slower to scrub through.

Here is an example of the Source Window Zoom Bar zoomed out, making for slower scrubbing.

Whereas here the Source Window Zoom Bar is zoomed in, making for faster scrubbing.

THE TIMELINE
The Timeline is where users add clips to their sequences, make editorial changes to them, add visual and audio special effects, mix soundtracks and add titles and graphics.
Here we have double-clicked on the sequence in the project panel and it is open in the timeline.

The sequence is open, but no media have been added yet, so the timeline is still empty.

Here's a guide to the timeline after we've done some editing to the sequence:
a. timecode
b. playhead
c. work area
d. source track [VIDEO]
e. source track [AUDIO]
f. sequence track headers
g. video clips in sequence tracks
h. audio clips in sequence tracks
b. playhead
c. work area
d. source track [VIDEO]
e. source track [AUDIO]
f. sequence track headers
g. video clips in sequence tracks
h. audio clips in sequence tracks

UNDERSTANDING TRACKS
Sequences have video and audio tracks that constrain the positions of clips on the Timeline. The simplest sequence would have just one video track and perhaps one audio track. Editors add clips and audio files to the tracks, one after another, from left to right, and then play them in the order they have been positioned.
Our rule for video tracks is: less is more. Try to create a single continuous track that represents your movie before you layer other tracks on top of it.
Audio tracks are a different story. You should try to designate a specific purpose and function for each track so that when it becomes necessary to isolate a particular audio clip on a particular track, said clip can be quickly and easily located.
Carefully consider the purpose of each track. Typically, audio tracks are isolated according to functions such as narration, music, spot effects and ambience.

TARGETING TRACKS
Track Headers are more than name plates.
They also act as enable/disable buttons for the tracks when editing new clips
into the sequence. Turning off a track can prevent a clip, or part of a clip,
from being placed into it.
To target a particular track, simply click on the Track Header. If is highlighted grey, then that track has been targeted.

To the left of the track headers, you will see an extra set of buttons that represent available tracks for the clip currently displayed in the Source Monitor. These are the Source Track Indicators.
The position of the Source Track Indicators means a clip will be added
to those particular tracks when inserted from the Source Monitor into the
Timeline.
Source Track Indicators can be moved by dragging and dropping them next to specific tracks. Here we are moving the VIDEO source from the VIDEO 1 sequence track to the VIDEO 2 track, and the AUDIO source from the CAMERA AUDIO sequence track to the RM (room tone or ambience) track.

And here we see the VIDEO source track now targeting the VIDEO 2 sequence track and the AUDIO source targeting the RM track.

|
|
LOCKING TRACKS |
You may wish to protect a track in order to prevent it from being accidentally altered. You can lock a track by activating the [LOCK] toggle in the box in the track header. This will prevent you from targeting any material to this track while editing. (Note the grey hash marks that appear over the locked tracks.)

Click here to proceed to the next section of this editing guide.
